
Part 1: Quick guide to measuring glass partitioning
- Paulo Ferreira

- Apr 30, 2018
- 5 min read
Updated: Apr 21, 2020
Making sure your glass partitioning project runs on time and on budget is of vital importance. Getting your sizes wrong could be a very costly error and delay your project. Further, once your glass has been manufactured it cannot be changed. Glass cannot be shaved or trimmed down on site as with other materials such as timber, stone or steel. Also, in partitioning, there is very little margin for error as gaps and pockets inside the glazing channel usually allows for 3mm to 6mm play (this will depend on the system, joints and glazing method being used).
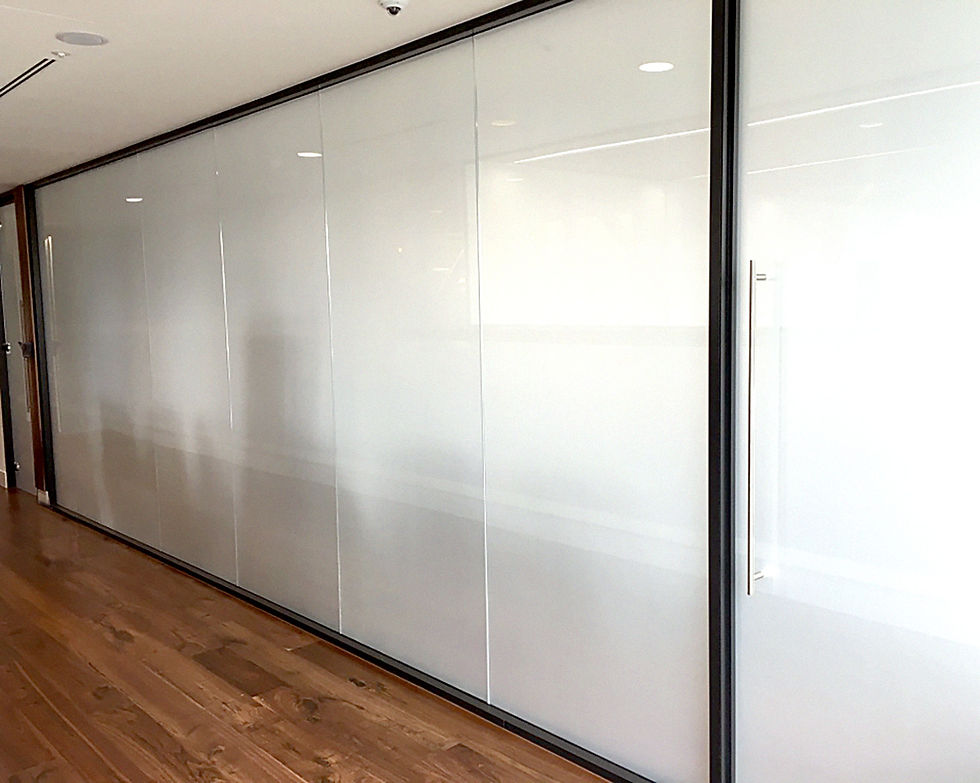
Thus, it is important you use an experienced partitioning company, who has excellent knowledge in various partitioning systems and who understand the partitioning project specifications. Prism Glass has completed countless partitioning glass projects in many prestigious locations in and outside of London. One such projects were the recently completed WeWork Tower Bridge Office Partitioning Project where more than 1,000 linear metres of glass and glazing track was measured and installed successfully within ten weeks!
At Prism Glass, we perform the surveying and glass measuring process in 2 parts:
Measuring openings and site survey
Measuring glass for production and install
Measuring the openings will help generate an estimate if needed. It will also help establish how much glazing track material is necessary to ensure all track work is fitted. Once this is done, the glass can be measured, ordered and installed. A site survey will help establish the installation method and, pick up any potential hazards and snags.
For this article, we will look at the first stage of this process: Measuring openings and site surveys.
Measuring openings
To order the glazing track materials (also referred to as U-Channel), work out costs and time needed to complete the job, all existing openings to be glazed will need to be measured. This is the first step in any glass partitioning project. All surfaces should be finished in readiness to install the glazing track, including ceilings, walls and flooring.
Here are just some of the steps and considerations we make when measuring openings:
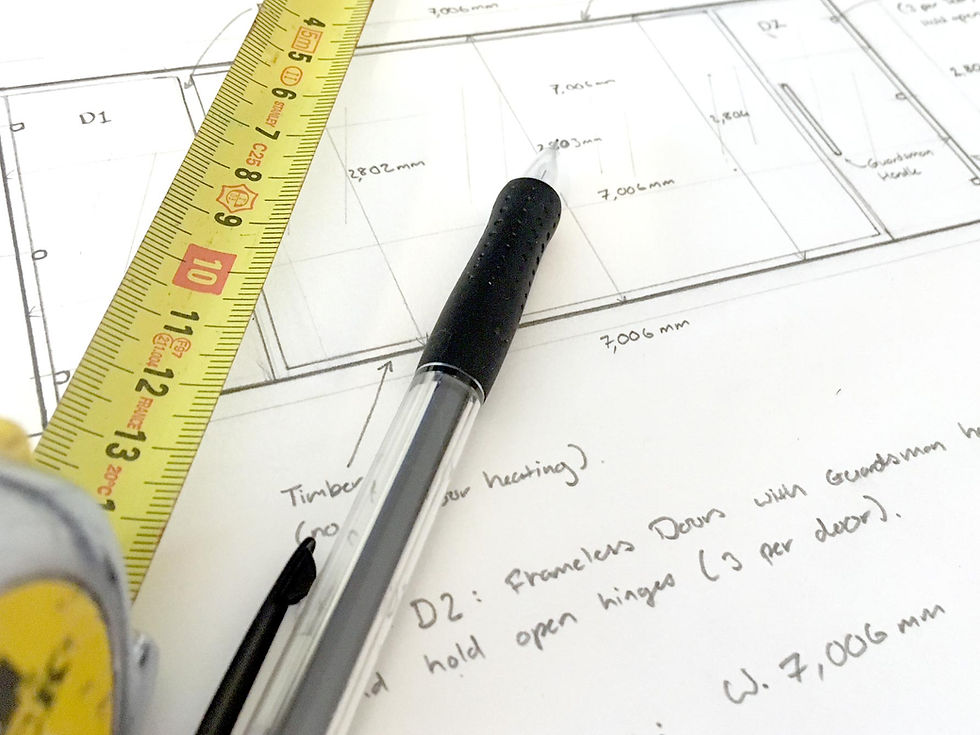
Measurements of the height and width of the openings should be taken to the millimetres. Depending on the size of the opening, measurements are taken from different points for both heights and widths. On smaller openings, we usually do this from at least 3 points - one on each end and one in the centre of the opening. This will help establish if there are any variances in the openings to be glazed.
Surface levels must be checked including floors, walls and ceiling. This can be done either using a spirit level or professional laser level to check horizontal levels and vertical levels. This step is especially crucial for glass door installation.
Surface areas should be checked to ensure the track will cover nothing and the track can be installed flush to the surface. Things to note include uneven surfaces, lighting and electrics, ceiling lights, plug points, switches, cables and cable ducting may need to be moved due to the partitioning. These tasks should be done by a qualified professional prior to installing the glazing track. For example, water pipes may need to be moved by a qualified plumber or cut-outs will need to be made when not possible. If skirting is used, the wall glazing track (called wall abutments) will need to be cut, or the skirting can be cut, so the track can be installed flush to the wall. Air ventilation and air ducts which lie directly under the glazing area will need to be moved before glazing (it is vital to ensure all rooms have required airflow and ventilation).
A hand drawing of the area or areas to be glazed is created on-site. This drawing will include measurements, door positions, level differences and any special notes such as skirting cut-outs and pipework. Cut out sizes for skirting, piping, etc. should be included in the drawings and notes.
Site surveys
Site surveys are often neglected but are an essential part of the process. A full site survey helps avoid any surprises on the day of installation. It also helps cover any risks, identify hazards, site requirements and install methods.
These are just some of the checks made during a site survey:
Check access routes; this includes checking the delivery bay, delivery requirements and walking the route in which all materials including glass will be carried from the delivery bay to site. If the materials are to go in a lift to the site floor, the lift should be measured to ensure channel lengths and glass will fit. If the materials are to go via a staircase, this should also be checked and measured to ensure the glass panels and track lengths can fit. Stair landings need to be wide enough when turning to take the full length of the materials. Trip hazards, low overhanging hazards, public areas, etc. that are part of the access route must be noted to ensure precautions are taken for the day of the delivery and install.
Perform a full review of the agreed storage and work areas.
Check that there are no cables, underfloor heating or pipes running underneath the surface of the glazing area (including wall, floor and ceiling). If this information is not available on-site a qualified professional, such as an electrician (or plumber in the case of pipework) will be needed to make these checks. Drilling will be required to fix glazing track or U-Channel to the walls, floor and ceiling. This is especially important if floor springs are to be used for the doors, as this will require a large hole to be made in the floor. It may mean positioning the door elsewhere to avoid additional work to move pipes or cables.
Notes should include particular site rules and requirements, such as specific PPE requirements, noise restrictions, delivery times, etc. Also, any other potential hazards must be noted as part of the survey and action taken.
Summary
For Part 1 of this guide, we have established the importance of accuracy when measuring and going through all checks on-site, including performing a full site survey and review. Once this is done, glazing track materials can be ordered and installed. Following the glazing track installation, the glass is ready to be measured for production.
It is impossible to cover all aspects of measuring, and site surveys in these articles and these articles should be viewed as a guide only. These are just some on the steps we usually take. Each project should be treated separately, as no project is the same. You should use experienced partitioning fitters to both measure and install your glass partitioning project - this will reduce unnecessary delays, wastage and costly errors.
If you need any help with your glass project, please contact us. For next month and Part 2: Quick Guide to Measuring Glass Partitioning, we will be looking at measuring glass for production.
About the writer: Paulo Ferreira has extensive experience in project management and worked at Prism Glass for two years, where he managed glass installation projects and day to day operations. He also has extensive experience in financial services. His skills include graphic design, branding, content marketing and blogging.
Note: All content, including blogs, images, drawings and posts on this website are for general information and guidance only. Content is not intended to form any part of a contract and is subject to change without notice as expressed in the website's Terms of Use.
Comments